Import
This page will provide you with information about how to import the reference project into the STM32 Cube IDE.
Prerequisites
Locally installed STM32 Cube IDE 1.5.1
First time STM32 Cube IDE project import
- First of all you have to run the following commands in your local directory for cloning the reference project:
git clone https://github.com/CosmOS-Creators/reference_project_stmIDE.git . --recurse-submodules
git submodule foreach git checkout master
- After cloning the reference project we open the STM32 Cube IDE and go to the menu option .

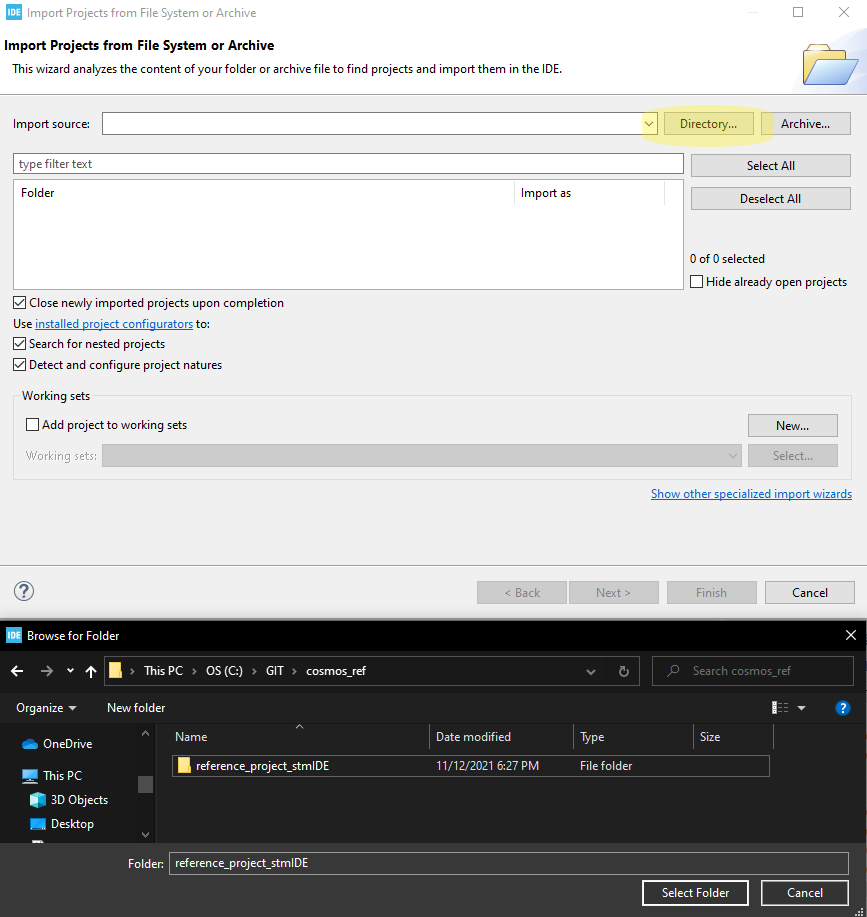
- Then a window Import Projects from File System or Archive will show up and we click on the highlighted button Directory. The file explorer window will show up and we point to the reference project directory and press the button Select Folder.
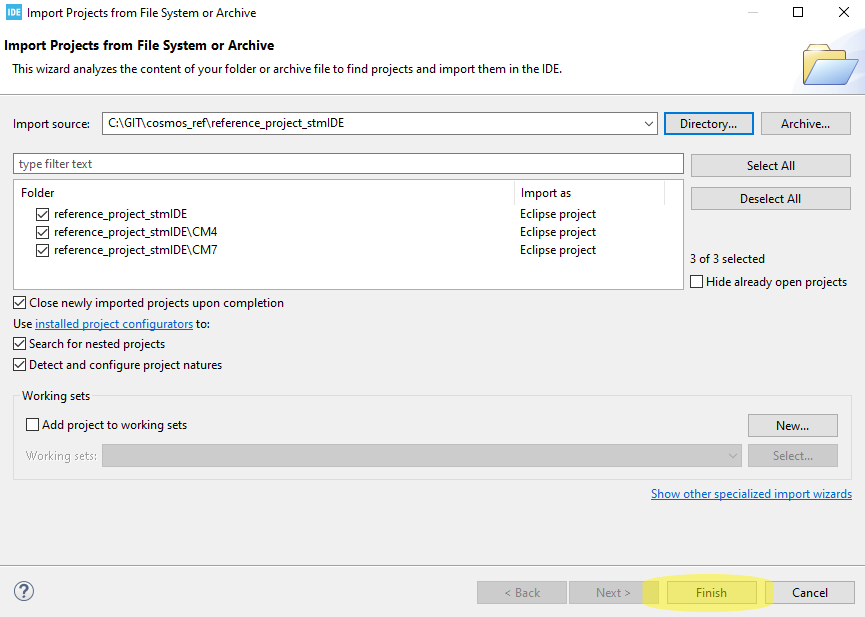
- After this point we just click on the button Finish and STM32 Cube IDE will import the whole nested project structure.
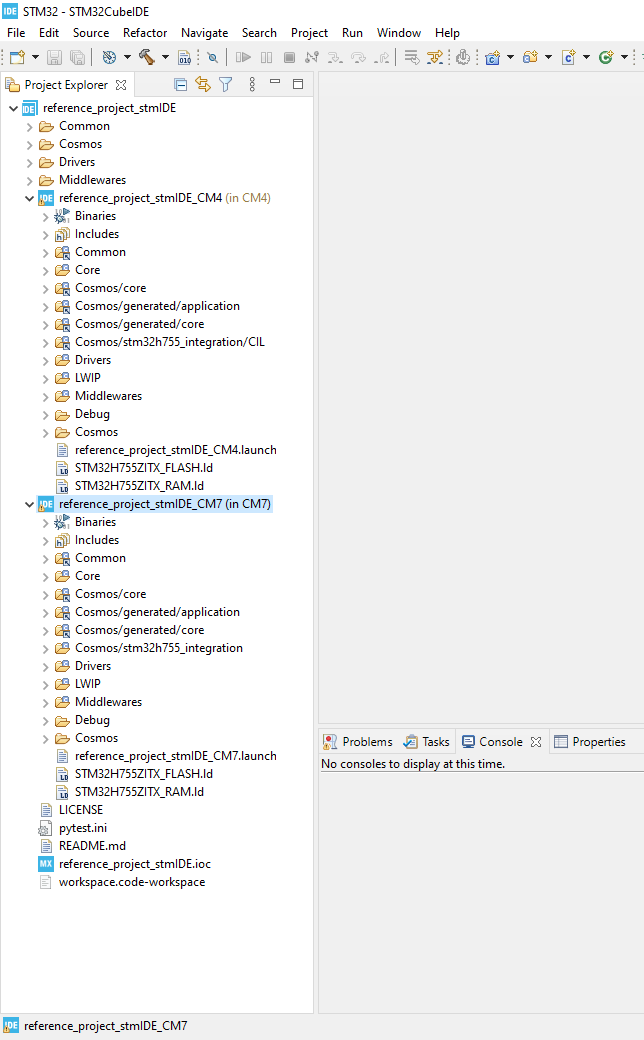
- If the project import was successful we will see the reference_project_stmIDE in the Project Explorer on the left side of the STM32 Cube IDE.
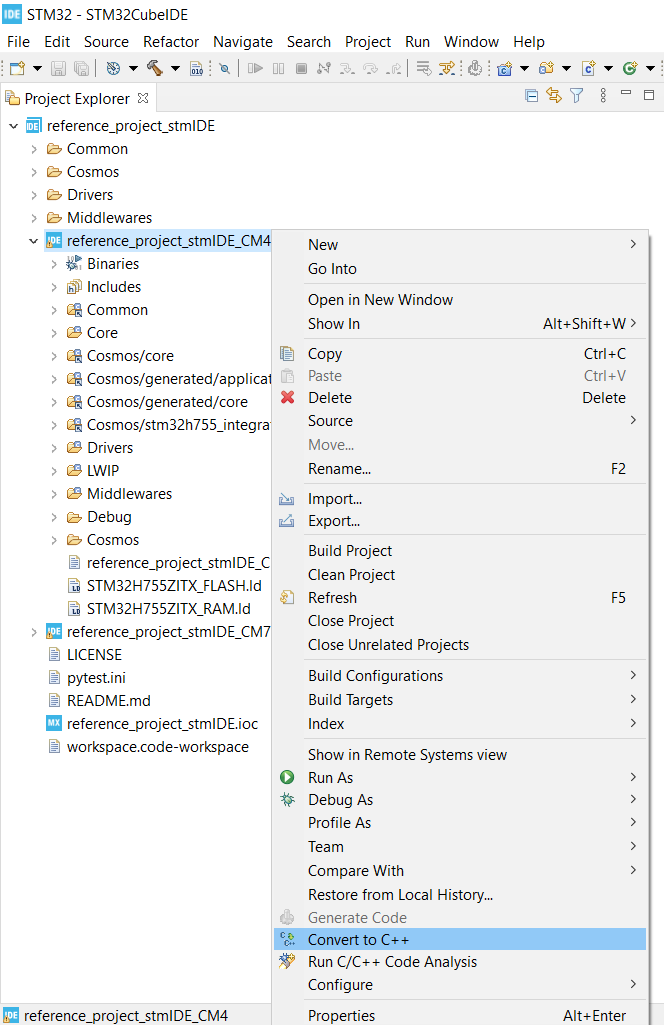
- In the end we have to ensure that the projects for the both cores are converted to the C++ language. We highlight the core one by one and check if there is an option to convert it to C++, if it was not already done.